2012. április 29., vasárnap

No tripod, still want long exposure photos of people?

It's sure we've all seen long exposure photos taken of people that are not blurry in the photos, but everything else is. It looks artistic and professional. In fact, it's not that difficult to reach the desired results if you have a camera with manual settings.

Firstly, make sure you can set the shutter speed manually. If yes, set it either to 1/5 second or 1 second. The aperture value can remain large, f/1.8-f/2.8 in order to separate your subject from the background. Switch on your pop-up flash (if you don't own a flashgun) and there we go, take the photo.

I used exactly the same method to produce the following photos:


2012. április 22., vasárnap

Where not to take your expensive camera out of your bag

As other big cities, Budapest also has its areas where taking your camera out of your bag may mean a threat to the security of your valuable equipment.

I highly doubt you'll ever visith the 8th district, not Múzeum körút and its surrounding area, but the area close to Nagykörút, where tram no. 4-6 runs (next to stops: Corvin Negyed, Harminckettesek tere). Be sure to walk streetwise in order to avoid unpleasant situations.

However, it's more likely that you'll find yourself taking a stroll near Blaha Lujza tér, Wesselényi utca, Király utca. The main road itself is relatively safe (Nagykörút); however, Akácfa utca and Király utca may not be the best place to take photos after sunset, despite of the fact there are usually many people around at that time as well.

The group of considerably unsafe areas also include certain parts of Újpest, Kispest, Kőbánya-Kispest. Avoid these areas and you will be doing fine during your stay. Of course, buses are also home to pickpockets, just like in any other big city, but if you hold on firmly to your belongings, no harm will come to you.


If you have questions concerning your personal safety and stay in Budapest, feel free to leave comments below.


2012. április 15., vasárnap

How to protect your lens

Your camera and lens combo worths probably more than an average man in Hungary earns in two months; bearing this in mind, taking care of your equipment is vital in order to keep it as your loyal companion. It is said, however, that the lens itself is even more important than the camera itself, so there are some steps you need to take first.

Wiping off the dust from the front lens is usually not enough. You always need to be prepared for the worst that can ever happen to your precious lens, dropping it. The most significant step is to protect the front glass element. There are two ways to do so; either you buy a screw-in filter or purchase a lenshood that prevents the front elment from being exposed to sudden landings.

Screw-in filters, usually UV filters for protection, are said to decrease image quality; but it's barely noticeable with today's 18-20-megapixel sensors. One great advantage of using a filter is that it protects the front lens from smudge marks, fingerprints, dust, waterdrops. Another reason that must be considered when buying one is that it absorbs the force of the impact when the lens is dropped, and it's way more cheaper to replace a broken filter than a whole glass unit!

Some others, on the other hand, prefer using a lenshood for the sake of protection. Lenshoods also absorb the force that's generated by accidental droppings, but they don't protect the lens from fingerprints, smudge marks, and other impacts. What's more, it doesn't reduce the sharpness of the image, while it prevents your image from getting unwanted flares.

Apart from protecting it from having its front lens element crashed, there are other things to keep in mind. For instance, avoid keeping your lens in humid environment. Humidity can make fungus grow inside the lens, which may apparently destroy the coating on the glass elements. If you swap lenses, be sure to put both the front and the rear cap on the lens body to avoid dust gathered inside it.


2012. április 8., vasárnap

A good spot for fashion photography in Budapest

Have you ever wondered where to do your fashion photoshoot in Budapest? I was asked to help a friend of mine, who studies to be a fashion designer, do a photoshoot for her assignment. She was given the task to have a series of photos that complies with the topic "Mixed Patterns." I instantly said yes, but I was quite nervous when I had to find a great place where we could take the photos. The weather was awful, rainy and cold, but we insisted on doing it outdoors.

I finally came up with the idea of doing the photoshoot under the arcades of an old building near Deak Ferenc ter, in Jozsef Attila utca. As it was overcast, light filtered through the clouds and gave us some nice diffused lights. As for the equipment, I wanted to make it as simple as possible, so I didn't take my strobes whatsoever; I took my Canon eos 60D and a Canon EF 50mm f1.8 lens to get some nice background blur and sharp images. 

You can check some photos below:


2012. április 1., vasárnap

Quality on the budget

I've already written about how to reach shallow depth of field, background blur, and how to get those stunning bokeh lights. Well, the prime lenses that photographers use to get these effects usually cost a lot, mainly depending on the maximum aperture value of the lens. However, there is a way to get the most out of your camera, even if you don't want to spend a fortune on the lens.

Old cameras, SLRs usually had prime stock lenses, which usually meant a 50mm f1.8 or 55mm f2.0 lens. Nowadays, these lenses can be purchased for a few bucks on ebay or in local camera stores that sell second-hand photography equipment. The great news is that some old lenses can be mount on today's DSLRs, thus getting a prime lens without spending $200-$300 is now possible. All you need to do is get the proper adapter to mount on your lens to make it fit your camera. However, there are some drawbacks of this process. For instance, you'll have NO autofocus available when you use old manual lenses on your camera body.

There are certain lenses with certain lens mounts that can be mounted on DSLRs, and there are certain DSLRs that can't be used with old lenses. Let's take a look at each of the great names of the camera manufacturing industry.

  1. Canon

    A Canon camera is probably the best choice if you have the intention of using your old or freshly purchased cheapo lenses that actually deliver great image quality. With the proper adapter you can adapt the following old lens mounts to a Canon eos camera body: M42 screw mount, Pentax K mount, Nikon, Leica R, Medium format lenses (Mamiya 645, Hasselblad). But it's important to note that old Canon FD lenses can only be attached to EOS bodies if you use an adapter with an optical element in it, so you'll have focus to infinity. However, the optical element highly ruines the lens' image quality; it becomes less sharp and color fringing becomes noticable. You must be careful when you'd like to use a high aperture lens with a full-frame body, as the mirror in your camera might hit the rear optical element of the lens! This only occurs with full-frame cameras, APS-C (1.6x crop factos) and APS-H (1.3x) cameras won't have their mirrors hit.


    A Canon EOS body with an M42 screw mount Tomioka 55/1.2

  2. Nikon

    Nikon users don't have that great latitude that Canon users have, as Nikon cameras can only work with old manual Nikkor lenses. These are re expensive, even on the used market. However, the best thing about using an old Nikkor lens on a digital SLR is that you need no adapter to attach it to your camera. Nota bene, using other manual lenses on Nikons won't let you use the built-in light metering of the camera.
  3. Pentax

    Pentax still uses the same mount as their '60-'70 models, thus those old Pentax K mount lenses can be mounted on any new DSLRs. Used manual Pentax lenses are usually cheap and ebay is literally inundated with these!


    According to my own experiences, using old manual lenses can be a great solution if you'd like to experiment with these lens and want to achieve great results. However, not having autofocus might set you back from capturing great moments that otherwise could've been taken with an AF lens. It's worth trying them, and if you'd like to get rid of them, you can still sell them for the same price you purchased your lens.

2012. március 25., vasárnap

"Having the latest and greatest camera and lens in the world won't help you if you don't have an eye for photography" - Interview with Francis Keating

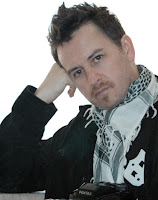
Recently, I had the chance to interview Francis Keating, a professional photographer from Australia who spent many years in Hungary.


1. Q: Tell us a little about yourself. How did you get involved in the art of photography? Do you remember your first camera?


A: I’m Francis Keating and I was born in
Australia. I still remember my first camera, which was a Minolta one with fixed lens I had in high school when I was a member of the photography club there. However, I cannot really recall the name of the exact model I used back then.
As for my journey to photography, it was a long one. The first time I got closer to photography emotionally was when I saw my uncle’s photos and it just started to interest me. After graduating from high school, I started to work and I didn’t really have the time for photography. Then in the 1990s, I travelled through
Europe and the States and I found myself involved in photography again. I had a small compact camera, which wasn’t really a flagship model. In Israel in the year of 1992, I met a good friend of mine who gave me his old camera gear which consisted of and old Pentax Spotmatic SLR and many lenses.
As I got more enthusiastic about photography, I took courses in
Budapest in 1996-1997. Well, the teacher told me that I was one of the best students in the group and it gave me a boost of confidence concerning this field of art.
After getting my education degree, I realised I wasn’t fond of teaching and I took elective courses at the
College of Arts. I liked taking photos –nudes, portraiture- way more than teaching.
I continued my way to
Taiwan, where I taught English. Actually, I had my exhibitions there and at that time, I mainly took photos of the Yangtzee and photos for magazine covers. I also took photos of jewellery and other products.


2. Q: Could you explain your philosophy for photography?


A: For me, it’s about going against a lot of rules, for which people tend to look at me in a strange way, but this is how it is. Firstly, I always focus on the composition and the aesthetic side of the photograph; and for me, concept comes later. I usually just take a photo and see if it fits a concept or not. A lot of my photos depict sadness, loneliness, solitude; which is not intentional at all. It may somehow come subconsciously.


3. Q: How much do you think Budapest is inspiring –in terms of photography- compared to Hong Kong or great urban areas of Australia?


A: I have to admit that
Budapest is a beautiful place and it has what I miss in Australia. Budapest has this uniqe, distinctive architecture and atmosphere that one can’t find in Australia. For instance, a few weeks ago, I took a photo of the frozen Danube, and I believe I couldn’t have taken a similar photo in Australia. However, my homeland is more than perfect for landscape photography.
As for
Hong Kong, I didn’t find it that inspiring, but small villages in China can really blow your mind! It’s important to note that the term “inspiring” highly depends on your style.


4. Q: What are your habits of taking photos in the streets?


A: It highly depends on the mood. When I travel, I usually use wide-angle lenses to get as much content into the photo as possible while getting closer to the subject to be able to separate it from the background and distracting factors. However, sometimes it’s not possible to take close-ups of subjects in the streets. For example, a couple of years ago, I took a photo of some old men playing chess in a park. I took that with a telephoto lens which had a focal length of approximately 200mm. A long lens is good to have if you don’t have the opportunity to get closer to what you’re trying to capture. There’s always a proper time and place for both kind of lenses.


5. Q: If you were to tell an amateur what to do when doing photography, what would you say?


A: Take the time to improve your composition; it’s very important. You should keep things simple and not try to get too much into the frame, because it’s distracting. Also, you should always focus on your subject, as this is one of the most important ingredients of a great photo. Apart from these, it’s also great if you dare to change your perspectives. People tend to take photos from eye level, which can become boring. Capturing images from ground level or waist level may make your photos way more interesting. Another common thing among shutterbugs is that they take the photo perfectly horizontally. Dare to go against the rules and tilt your camera a bit to give your image an unusal look.
Light is just as important as composition, an adequate setup can improve your photo, while bad light conditions can ruin the whole image. If you take photos outdoors, avoid the mid-day time when lights are very harsh. Cloudy days might be a bit better light-wise, since clouds act as light diffusers that filter the light coming from the sun.


6. Q: When teaching photography, what’s the first thing you tell your students they must always bear in mind?


A: Photography is a mixture of art and science; it’s about creativity. There are two basic groups of people. There are those who know everything about the technical side of photography and understand every single term, such as choosing the proper shutter speed, setting up lights etc.; but they don’t have the eye to creat a good image. And there are those who have a great eye and creativity, but don’t know the technical aspect. The most important thing is to have both; have a proper camera with fairly good technical knowledge, but also have the eye to use your equipment to capture great moments in a creative way.
Having the latest and greatest camera and lens in the world won't help you if you don't have an eye for photography.


Francis is now running photography courses in Budapest for beginners and intermediate photography enthusiasts! You can contact him at admin@dejavuphotographic.com

2012. március 18., vasárnap

3 steps to make your photo more interesting

It's never easy to get rid of the clichés we encounter on a daily basis on the internet. The Eiffel Tower, the view of a city, doors, and the list could go on for decades. However, there is always a way to make photos more exciting.

  1. Look for something unusual

    One may not be attentive and observant enough to notice the beauty of the street. There are everyday objects that aren't considered to be of great importance. However, it might be its odd shape, colour that could make it stand out of the mass.
    The following photo depicts a door without being special, yet the vivid and bright colours around it really makes it different and a great subject to take a photo of.


  2. Add some dramatic look

    Being creative when taking photos of city landscapes is not the easiest task. It's really difficult to make your photo different from others that you can see. One way to make it interesting is to apply some colour grading to your photo, thus making it special in some way.


    Without colour grading


    Colour gradding added


  3. Look for the perfect angle

    Why compose our photos in a perfectly horizontal way when there's a great potential in changing the usual composition? Dare to tilt your camera before capturing the moment!